
Osu Keyboard v2.1

Introduction
- Cost About 45 CNY
- CHERRY MX Series Key Switch
- refresh rate:1000HZ(1ms)
- Latency:6-10ms
- The three keys can all be set to Prefabricated
- keys(ESC/F1/F2/F8/F12/Space/Enter,ZX,ZC,AS,AD,PGUP/DN,↑↓,←→)
- The breath light(background light)can also show BPM when you are playing
- If u didn’t use it over 15s the breath light’s colour will change to idle colour(the colour can be customized)
- The key light can be set with 4modes(always on/always off/on when press/off when press)
List of material and tools
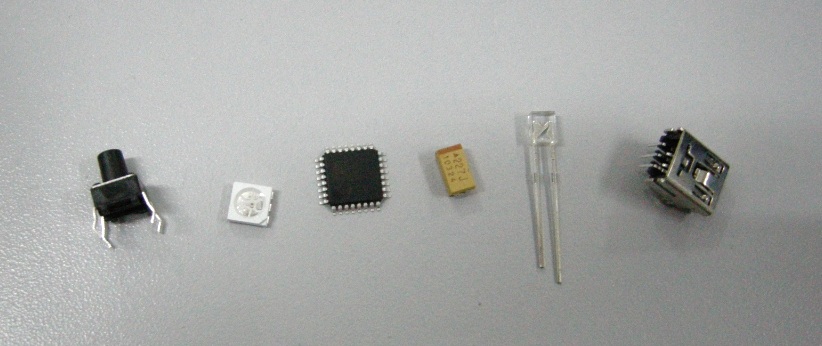
Electronic Components
| Name | packaging | Label | Count | Describe |
|---|---|---|---|---|
| PCB | 5*5cm | / | 1 | At “About PCB” |
| Atmega48PA | 32PIN TQFP | U1 | 1 | The main control chip |
| MINI USB Female | B-TYPE 5P 90degree | USB | 1 | |
| zener diode 3.6v | 1206 | D1 D2 | 2 | |
| Resistor271(270Ω) | 0805 | R7 R8 R9 | 3 | |
| Resistor102(1000Ω) | 0805 | R5 | 1 | |
| Resistor680(68Ω) | 0805 | R3 R4 | 2 | |
| Resistor471(470Ω) | 0805 | R1 R2 | 2 | |
| Capacitor220 (22pf) | 0805 | C1 C2 | 2 | |
| Capacitor104 (0.1uf) | 0805 | C4 | 1 | |
| Capacitor227 (220uf) | 6032 | C3 | 1 | Tantalum capacitor |
| RGBLED | 5050 | RGBLED | 1 | RGB LED |
| Microswitch | 6x6x8MM | BT3 | 1 | |
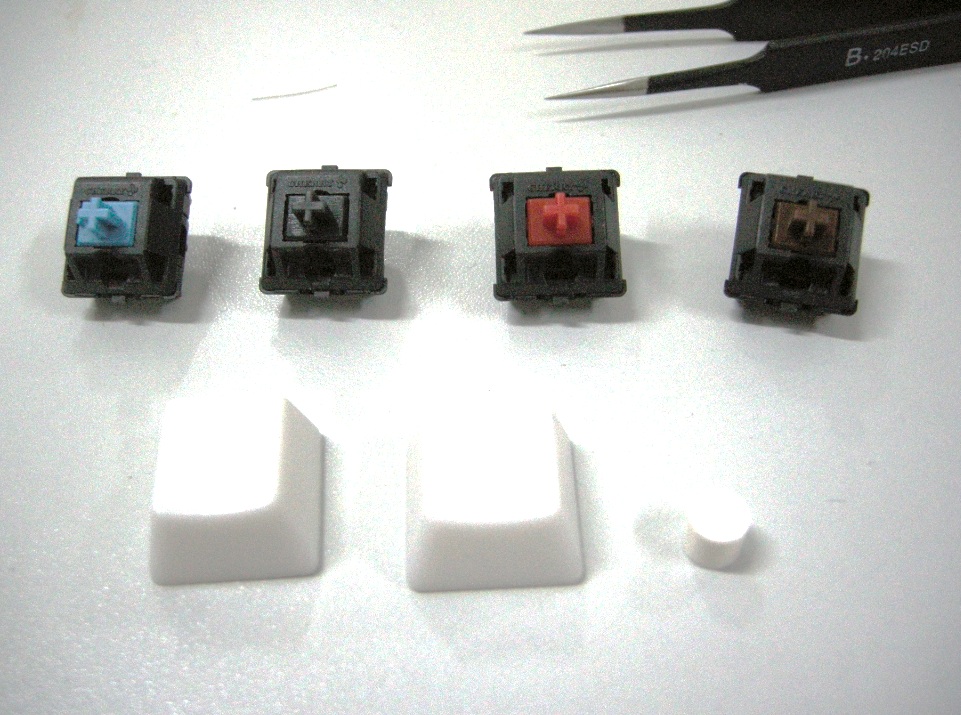
| CHERRY MX Switch | / | BT1 BT2 | 2 | |
| 3mm LED | 3mm | 2 | ||
| crystal oscillator | 20Mhz | Y1 | 1 |
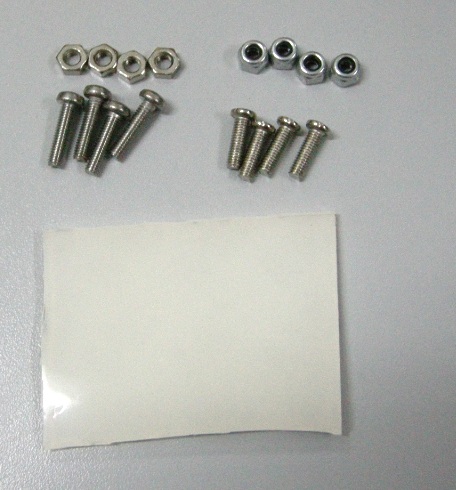
Shell
| Picture | Name | count | describe |
|---|
 |screw M3*12mm|4|fix the shell
 |nut M3|4|common nut,fix the shell
 |screw M3*10mm|4|fix the PCB
 |Non-slip nuts M3|4|fix the PCB
Other
| Name | count |
|---|---|
| cherry mx switch keycap R3 | 2 |
| microswitch keycap | 1 |
| silicone gasket 2mm | 1 |
Tools
| Name | count | describe |
|---|---|---|
| AtmelISP | 1 | program |
| screwdriver | 1 | |
| plier | 1 | You will need it when assemble the Non-slip nuts |
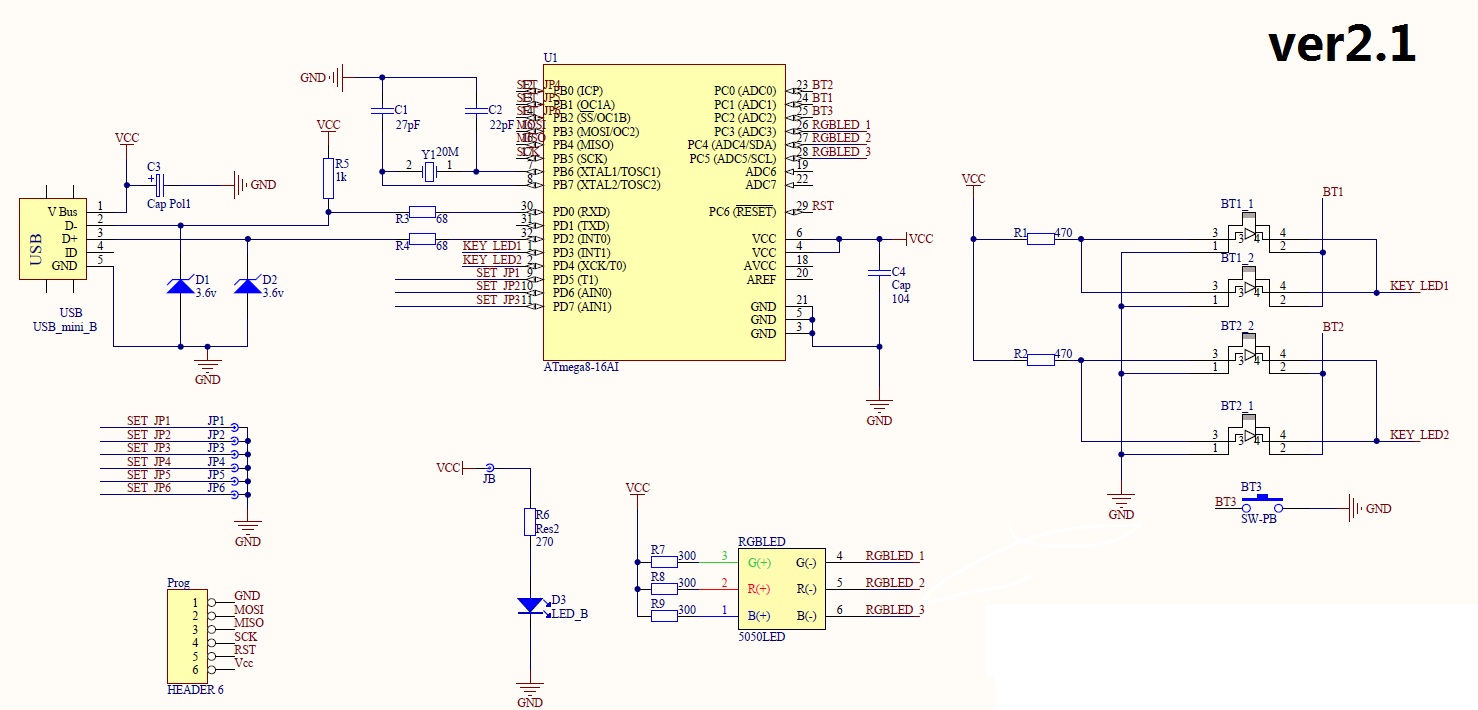
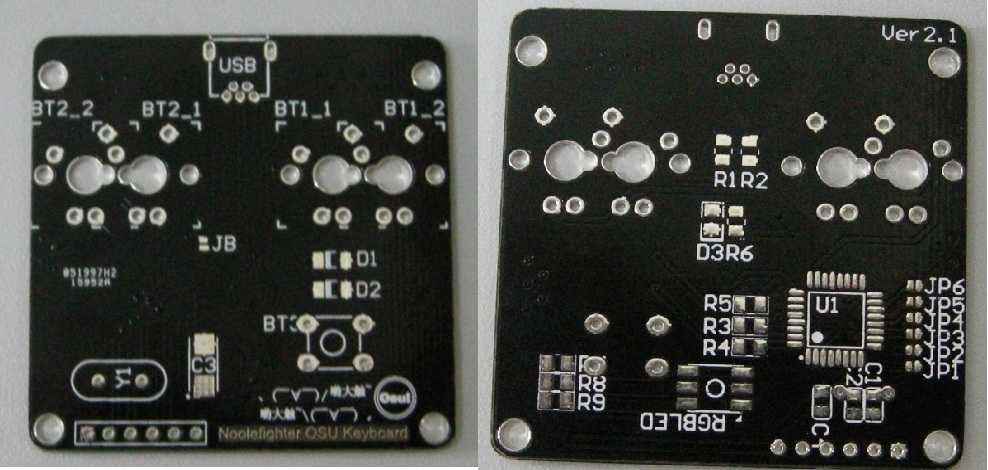
About PCB
The method of Keyboard connection is to use the V-USB Open source library(http://www.obdev.at/products/vusb/)
Here is the PCB file of Altium Designer 10(“PCB\OSUpcb.PcbDoc”) and already generated GERBER files(“PCB\GERBER”)
You need to contact a PCB producer to produce the PCB
Element list can be found at:” List of material and tools”
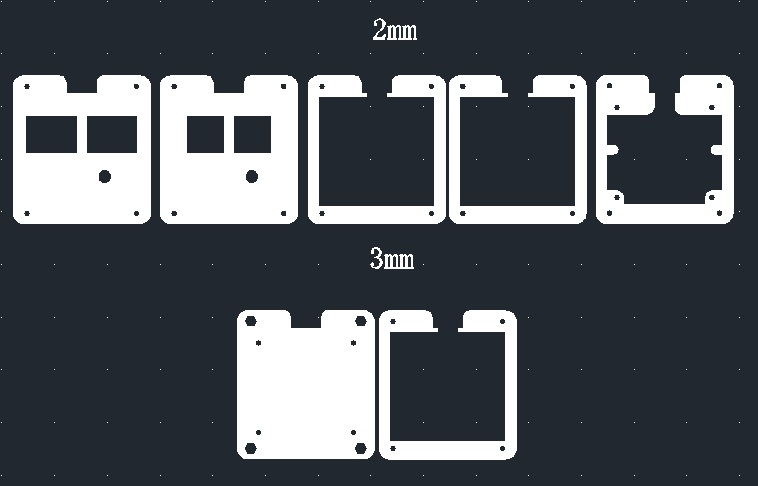
About shell
The shell(Acrylic plate) is cutted by laser,please give the file:(“Shell\standard.dwg”,created by AutoCAD2000, measurement in the file is mm) to suitable producer.
Caution:
1.The drawing need to use 3mm/2mm thick acrylic plate,please pay attation to the notes
2.About”Mini” shell(“Shell\mini.dwg”):This kind of shell is not very strong,please avoid outside shaking
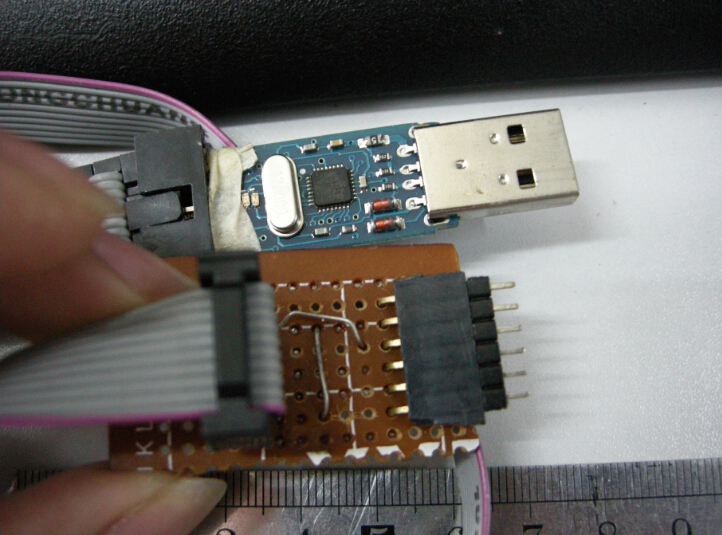
(atmelISP)
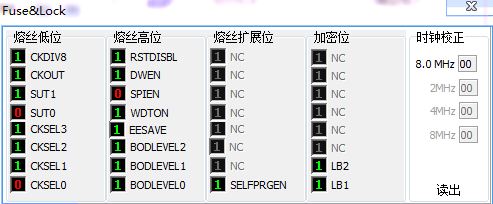
(Fuse)
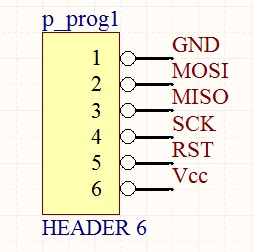
(ISP Define)
About the program on AVR chip
About the program on AVR chip
The compiled HEX file:”Prog\m48key.hex”
ISP Port is the streamlined 6PIN ISP,please reference the picture”ISP Define”
Setting of Fuse:
_
CKDIV8=1
CKSEL=1110
SUT=10
_
Note:
This program referenced a open sourse keyboard project called C64 Keyboard,thanks for the original author!
How to assemble
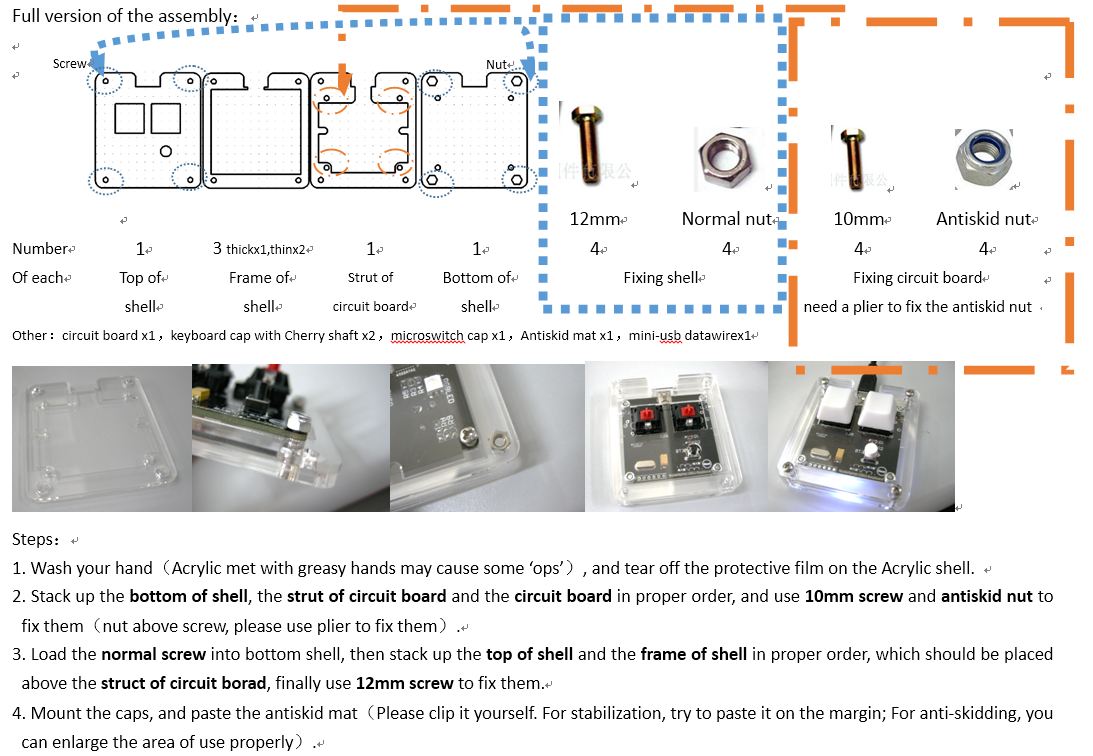
Or you can reference the file:” assemble_chs_eng.doc”
Or watch this Video(Chinese Sub):
http://www.tudou.com/programs/view/sbXESmsUZPg
Method of setup
On the pad
The setting save at its chips(will not lose when change PC or cutting of energy)
To check the setting,you need to use this free tool: Keyboard Test Utility
Two keys on the top are BT1 and BT2,the last one is BT3
“Long press” means:hold pressing over 0.5s
How to setup BT3:Press BT1 and BT2 in the same time,and then long press BT3
How to setup BT1/2:Press BT2 and BT3,and then long press BT1
How to custom the breath light:Press BT1 and BT3,and then long press BT2
Reference Video:
http://www.tudou.com/programs/view/mSUck6N8cYk
On the PCB
The both ends of JP(PCB Jumper):connected is 1,break off is 0
| JP2 | JP1 | Buttom Light |
|---|---|---|
| 0 | 0 | Light when press |
| 0 | 1 | Always on |
| 1 | 0 | Off when press |
| 1 | 1 | Always off |
Tips
If you want to add buttom light by yourself,please be careful about the positive and negative pole of the LED,and flashing program before you weld so that you can check you didn’t anti loaded.
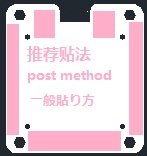
How can I make it look better?
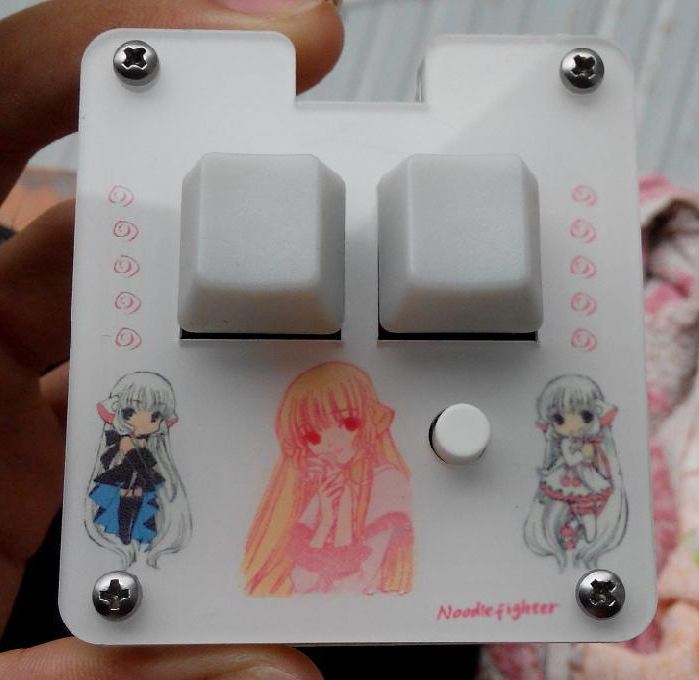
Here are two tips for you:
1.Use acrylic plate with different colour
2.Use Hydrographics(Wiki) and then spray some paint to hold it